
The "Inputs" panel on the "Budget & Inputs" tab holds the values your costs are calculated from. Those inputs are organized into sections and input groups, and both are set up by your company on the record template the estimate was created from — they are not fixed by Zebel, so what you see depends on how your template is configured.
A common way to organize them is by how well you know a number at that stage of the project — a section for the programming figures you can state before anything is drawn, and a second for the measured quantities that come from drawings. The "Hospital Template" in the examples below does exactly that, with sections named "Conceptual" and "Detailed". Yours may be named anything, and you may have one section, several, or none.
The structure has three levels.
A section is the outermost heading, and is optional.
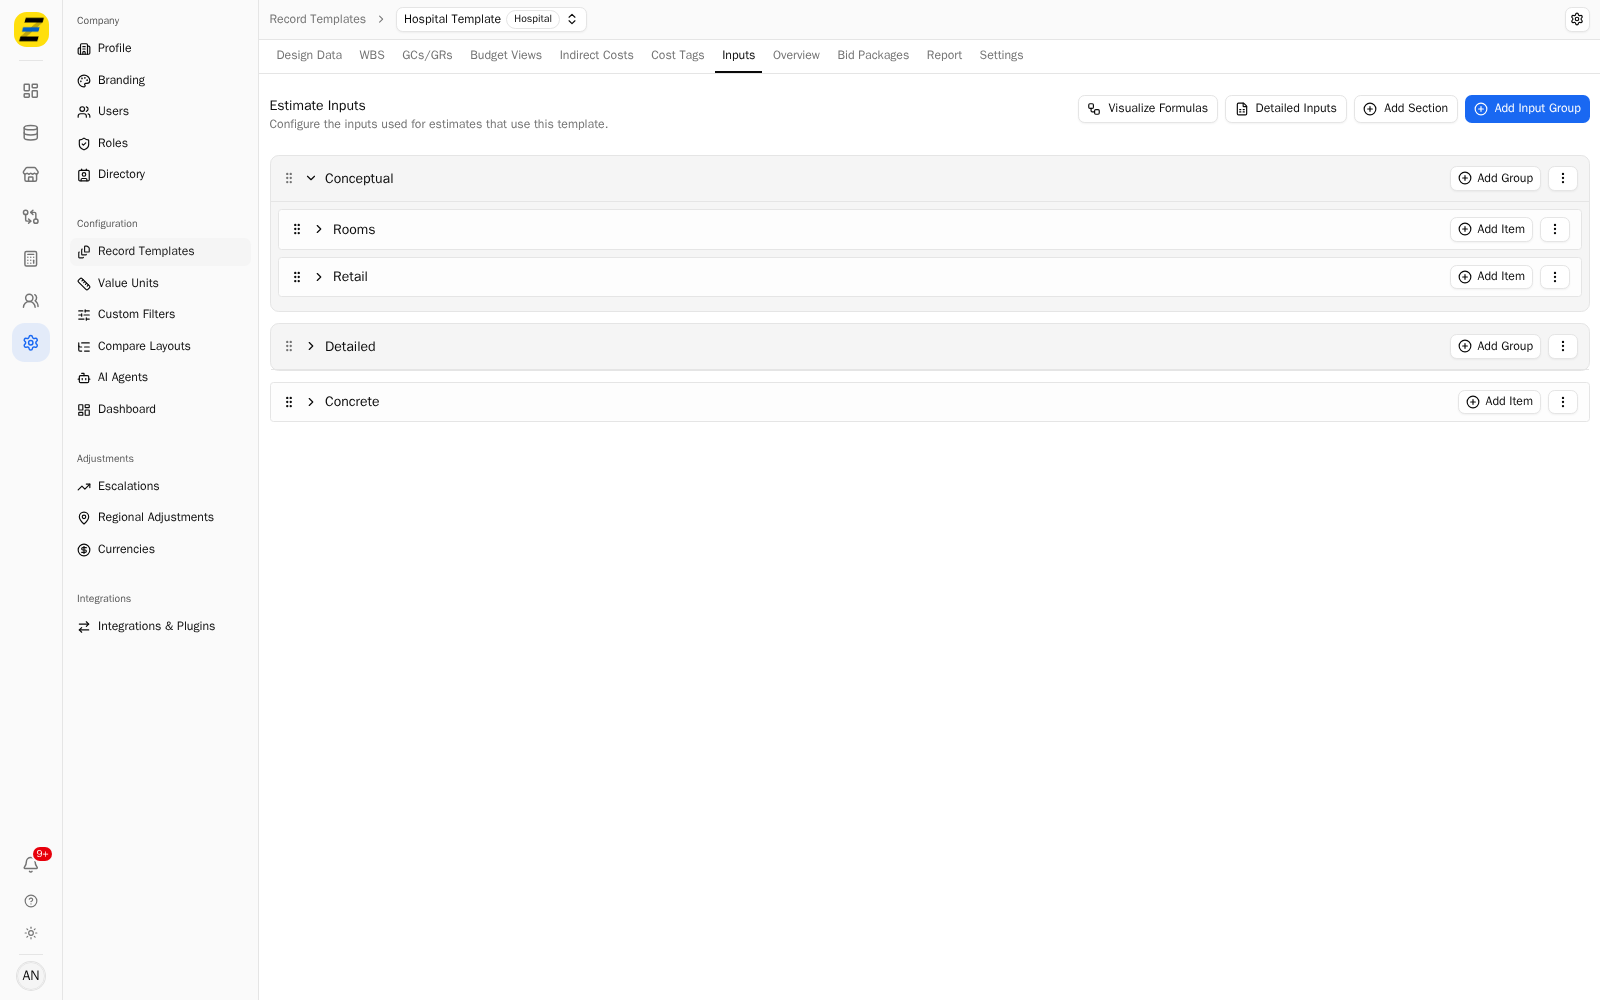
An input group sits inside a section — "Rooms" and "Retail" in the example. A group can also sit on its own outside any section, like "Concrete" does.
An item is the individual input inside a group — the number you actually type.
Setting up sections on a template
To change how inputs are organized, follow these steps.
Select "Settings", then "Record Templates" under "Configuration".
Select the template you want to change, then select the "Inputs" tab.
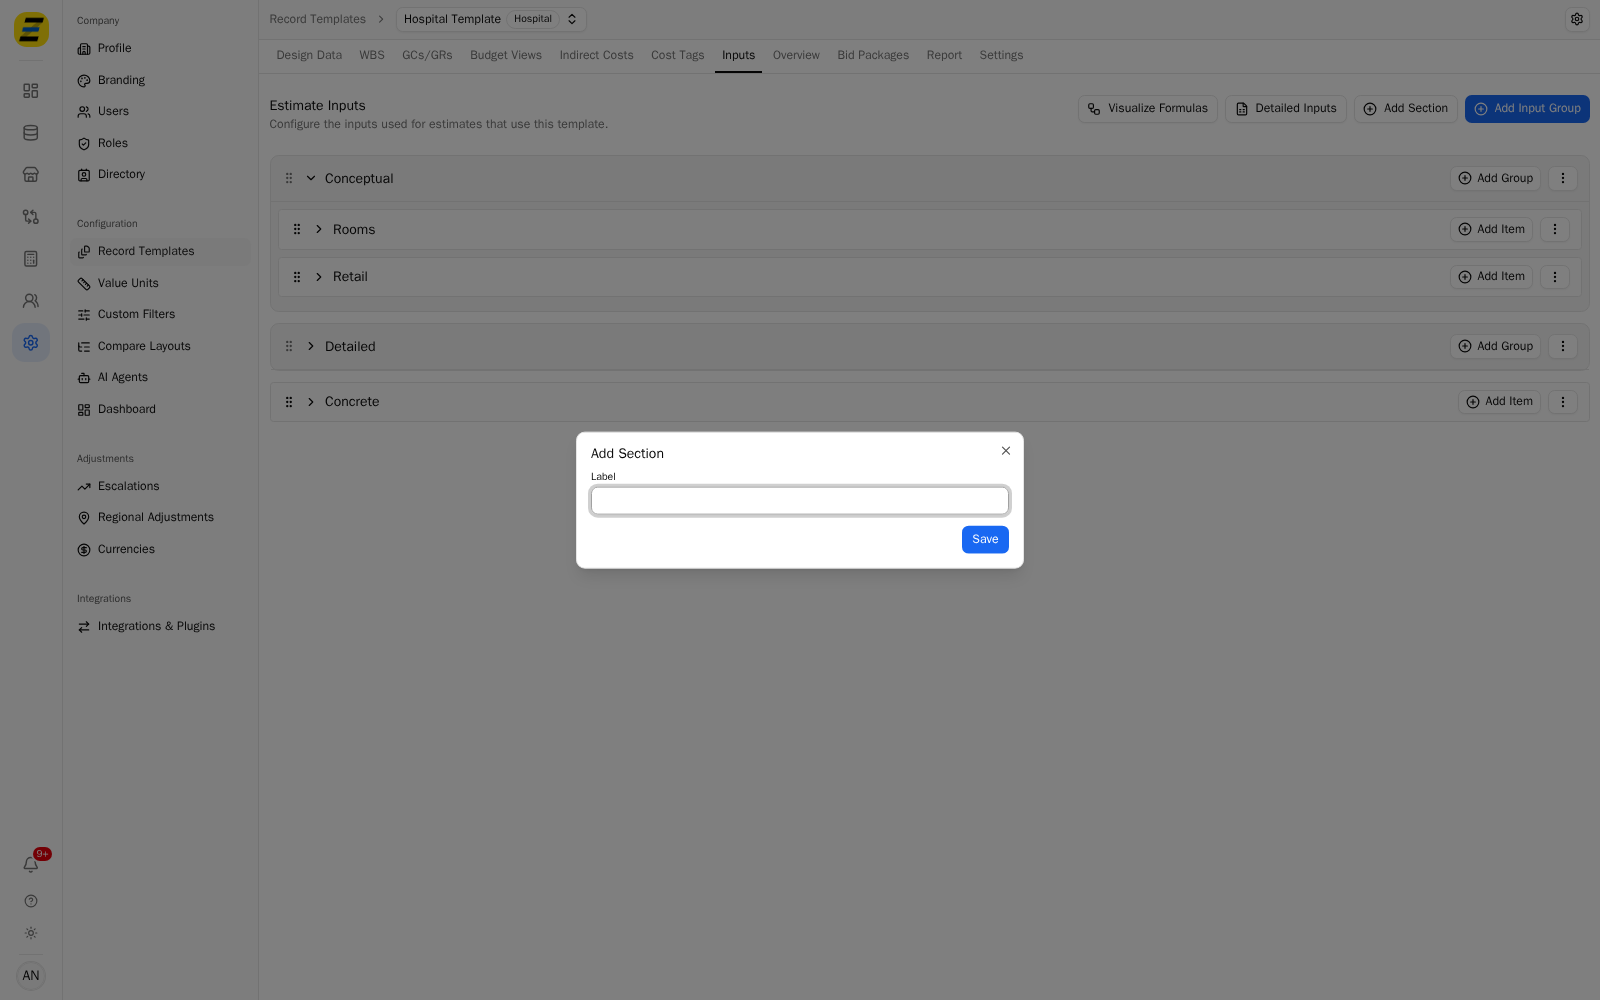
Press "Add Section", type a "Label", and press "Save". The new section is added to the bottom of the list.
Press "Add Group" on a section to put an input group inside it, or "Add Input Group" at the top of the page to create one that sits outside any section.
Press "Add Item" on a group to add the individual inputs.
Drag the handle at the left of any section, group or item to reorder it.
NOTE, changes made here apply to estimates created from this template afterwards. An estimate holds its own copy of the structure from the moment it is created, so editing the template does not rearrange estimates that already exist.
Entering inputs on an estimate
To fill in the inputs on an estimate, follow these steps.
Navigate to the desired estimate and select the "Budget & Inputs" tab.
Find the "Inputs" panel on the left. If it is hidden, press the panel icon beside the word "INPUTS" to open it.
Press a section heading to expand it, then press a group inside it to expand that. In the example, expanding "Conceptual" shows the "Rooms" and "Retail" groups.
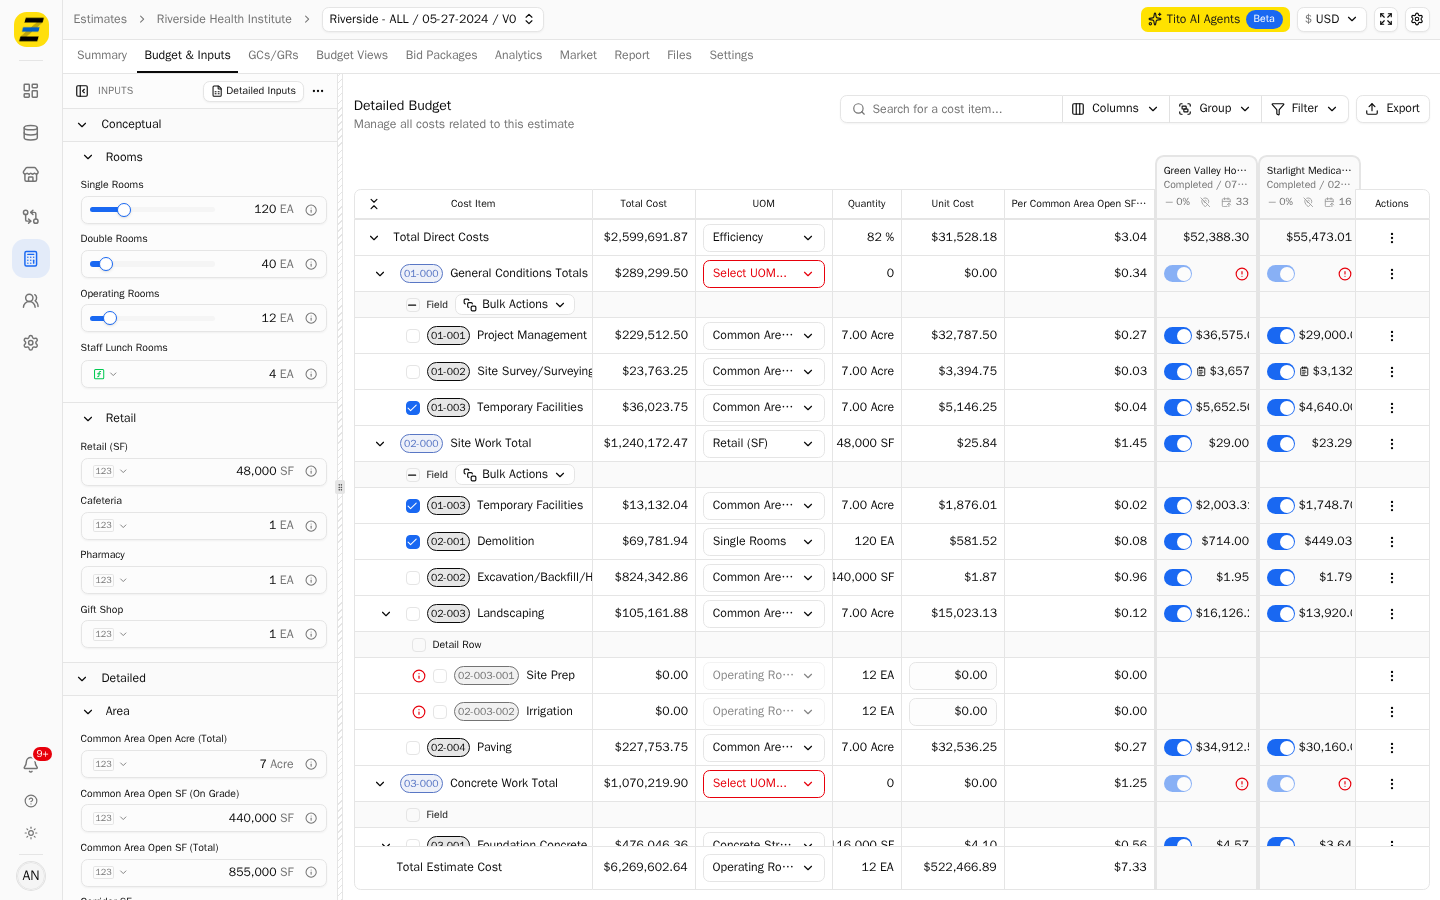
Enter what you know. Some fields have a slider — drag it, or type the number in the box beside it. In the example, "Single Rooms" is set to 120 EA and "Operating Rooms" to 12 EA.
Work through the other sections as the information becomes available. In the example, the "Detailed" section holds "Common Area Open SF (Total)" at 855,000 SF and "Efficiency" at 82%.
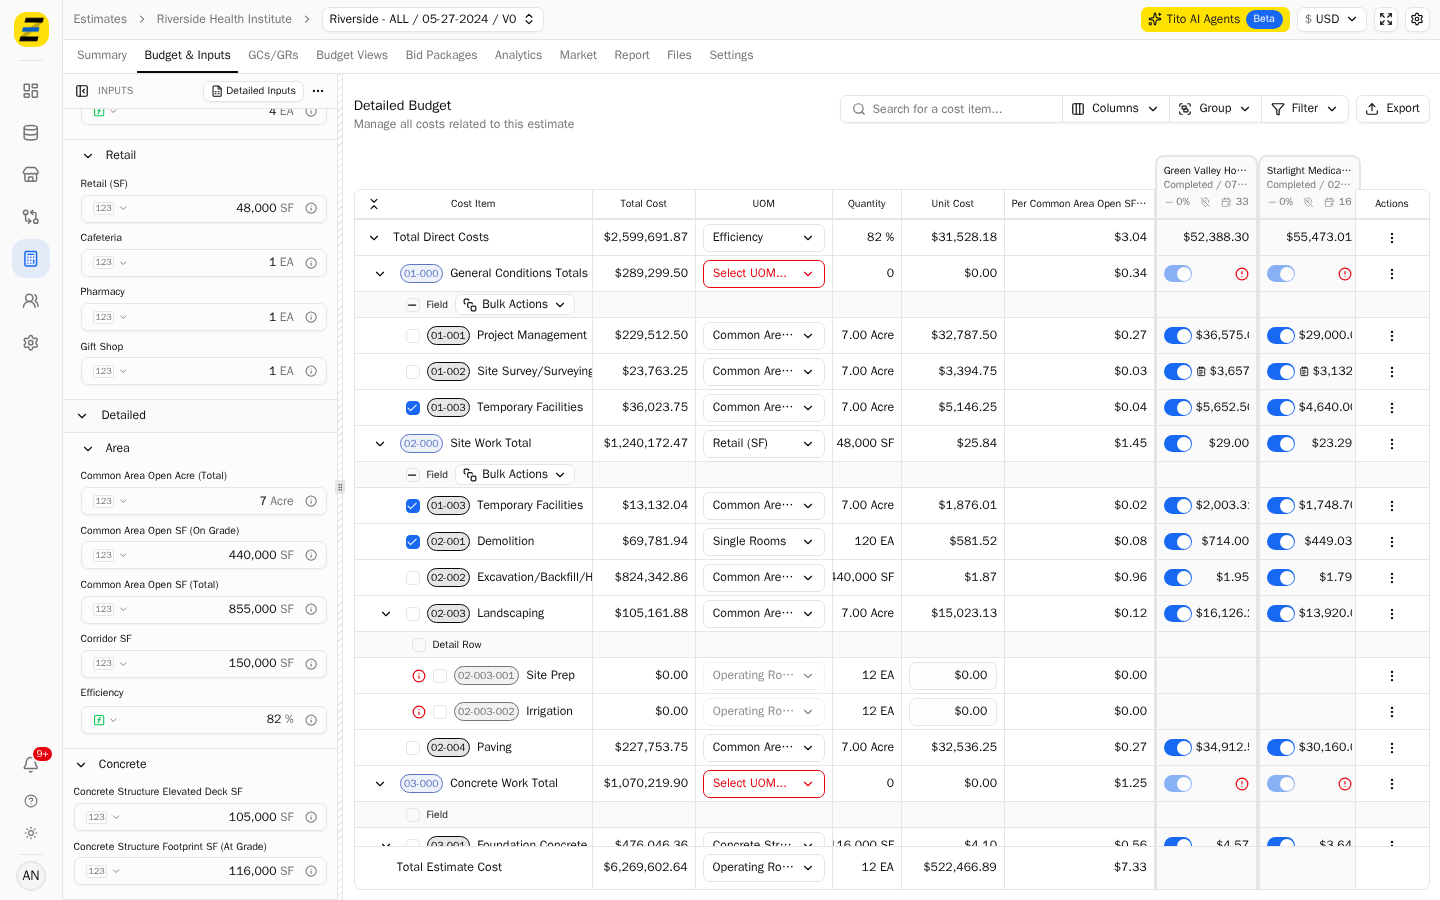
Watch the "Detailed Budget" table on the right. Every cost item is priced against one of these inputs — the "UOM" column shows which one, and the "Quantity" column shows the value you entered.
NOTE, you cannot add, rename or delete a section from the estimate. The headings you see come from the template, so that every estimate built from a template is laid out the same way. To change them, edit the template as above.
NOTE, you do not have to fill in everything. If your template separates early and measured inputs the way the example does, an early budget can be built from the first section alone and the rest filled in as drawings arrive.
NOTE, a field with a slider has a defined range, and a field showing a small calculator icon is derived from other inputs rather than typed — "Efficiency" and "Staff Lunch Rooms" are both calculated in the example.